![]()


![]()
![]()
![]()
![]()
![]()
![]()
![]()
![]()
![]()
![]()
![]()
![]()
![]()
|
|
|
|
Batch import images as reference in a cross-platform FileMaker Pro environmentThis page describe our findings regarding importing images in a FileMaker Server hosted file, while storing only a reference. It concentrates on how to make this work in a cross platform environment. NOTE This page is was created in 2004 and is intended for FileMaker Pro 6. You can now do this native starting from FileMaker Pro 7. See the he RefPict.fp7 example file in the download of Troi File 5.0. The information below is still valid for FileMaker 6. Also mounting a server disk is still needed. Test SetupThis information is based on testing done in November 2003, with this configuration: Servers:
For the client machines:
We used JPEGs for testing. We did not test other image formats, but expect similar results, provided FileMaker Pro supports it. SummaryFileMaker Pro can import images in a file hosted by FileMaker Server and store only a reference to that image (see fig. 1). 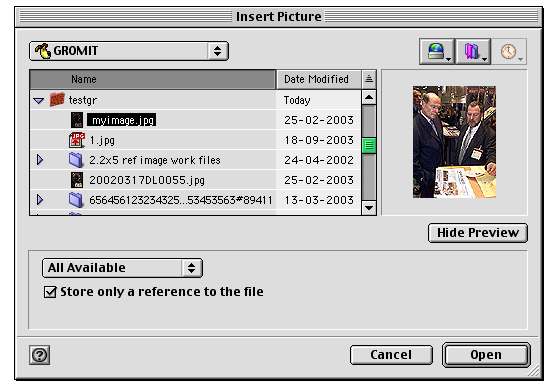
fig 1: Inserting a picture and storing only a reference
to the file It is possible to show the container with the image on all platforms, without FileMaker showing an error in the container as in shown fig. 2. 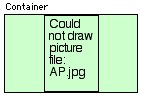
fig. 2: error in container field Finally it is possible to use the TrFile-RefToClip function of the Troi File Plug-in to do this all in a batch. However there are some rules you must follow, Rule 1: Setup your system so the full path is the same for all platformsThe images must reside in a shared folder on a file server that is accessible by all platforms. You have to make sure that the FileMaker Pro client can use the same full path on all platforms. This means that when you design your database system this must be set up so this is possible. When you are importing an image as reference you must use this full path. Note that the full path is constructed differently on Windows and on Mac OS: on Windows the drive letter is not used, but is replaced with the Volume label of the network disk. File server setupIn our test we a shared disk named GROMIT. In the shared disk you can create a several folders, FileMaker Pro does not have a problem with this. You can also create a subfolder in your folders. We used 'testa' in this case. We then shared the disk for all platforms. On Mac the common path for our setup is:
GROMIT:testa: NOTE the drive letter W can vary, but is not important. After you have mounted the disk on Windows (see
also here) check if the volume label is correct. It
should be GROMIT. You can see this by control
clicking on the network disk, and then selecting
Properties. You should see something similar to fig.
3. 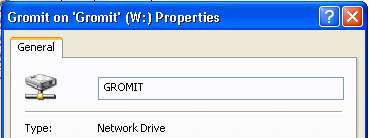 fig. 3: the volume label GROMIT
You can also check the volume label in a FileMaker script. See the DiskInfo.fp5 example in the download. Use this step: Set Field [Volume Label ,
External("TrFile-DiskInfo", " -GetVolumeLabel |" &
gDiskLetter) ] In figure 4 you see how this looks on the layout: 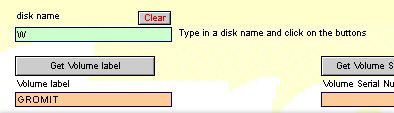
fig. 4: getting the volume label with the file plug-in and the DiskInfo.fp5 example
On Mac OS there is no drive letter of volume label, there the disk name is simply GROMIT. NOTE An important thing to be aware of is to not
change the full path to the images later in time, as
FileMaker Pro will not be able to find them after the
change. If your system is changed, and the full path becomes
invalid, you need to reimport the images. Rule 2: Make sure the shared disk is mounted before importing or showing the layout with the images on itThe images must reside in a shared folder on a file server that is accessible by all platforms. Required to make this shared folder accessible is that you mount the remote disk (or network disk) before the container is shown (or accessed) by FileMaker Pro. You can have the network disk is mounted by adding script steps to your startup script to your database system. You can use the TrFile-MountDisk function of the Troi File Plug-in for this, the steps will be similar to this: If [Abs( Status(Currentplatform) ) = 1] See the DiskMount.fp5 example in the download for more information. 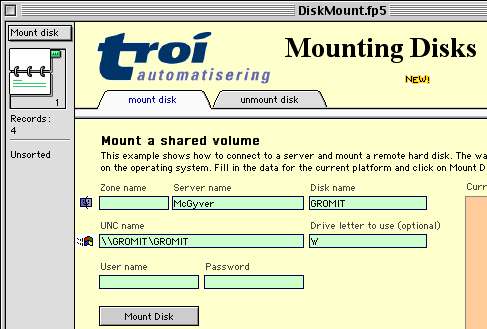 fig. 5: mounting disk GROMIT On Mac OS 9.x and Mac OS X mounting of a disk can also happen automatically when you show the container. However the system must have keychain access to be able to do this. Batch importingSee the Import1Image.fp5 example in the download for how to import 1 image by reference with the Troi File Plug-in. The function TrFile-ReferenceToClip in this example file uses a global gTheImport FileSpec to paste the reference into the container field: External("TrFile-ReferenceToClip", "-unused |" & gTheImport FileSpec & "|" & gPathToCurrentFile) The global gTheImport FileSpec should contain the full path to the image. In the Import1Image.fp5 example file you are prompted for an image filename. When you want to import in a batch you need to calculate the path to the image file and use that. See also the Image import v6.FP5 example for a batch version. It is a good idea to store the full path to the image in a text field in the same record as the container holding the reference. That way you can later create a new full path if you need to reimport. In the Import1Image.fp5 example this information is stored in 2 fields: the name of the file and the path to the image folder. 
fig. 6s: example in Import1Image.fp5 What to do when the full path changes?If you change the file server or if you reorganize the (sub-)folders the full path to the images changes, and FileMaker Pro can't find the images anymore. If this happens you need to reimport the images into FileMaker Pro file. Or if the number of images grows you might want to split the images into more folders. Lets say we move halve of the images from folder testa to a new folder called testb.
Now the containers should point to the new folder. Some other pointers
|
|
|
|